Setting up a Blog with Hugo and GitHub Pages
This post discusses the steps that were required to setup this blog.
- Choosing Hugo and GitHub Pages
- Initialize repository
- Write some content
- Create workflow to publish to GitHub Pages
- Push to GitHub
- Success!
- References
Choosing Hugo and GitHub Pages
Reasons for choosing Hugo:
- Highly customizable, and comes a great selection of ready-made themes for a number of different use cases.
- I can write all content in simple Markdown files.
- Is a single stand-alone binary, easy to install and use. The alternative of using Jekyll was discarded because it required Ruby (not to detract from Jekyll, I know it is an excellent tool).
- I have used it with great success in the past.
Reasons for choosing GitHub Pages:
- The blog is a simple static site, it does not have any complex server requirements.
- I don’t have to manage and self-host the blog.
- I can manage my content in a single git repository. This also feels to easier to backup, archive and manage the content.
- GitHub actions integration, I can simply push changes and CI/CD deploys my site in a few seconds.
Initialize repository
Create a new git repository. This is where our blog will live.
mkdir blog
cd blog
git init
Install hugo using your preferred method.
sudo snap install hugoWithin the
blogdirectory we created previously, initialize a new Hugo project:hugo new site --force .This will create a few default files and directories, as well as a
config.tomlfile. Update the file to match our configuration:# config.toml baseURL = 'https://neoaggelos.github.io/' languageCode = 'en-us' title = 'Blog'Hugo is highly customizable, but for simplicity we will stick to using a ready theme. There is quite a selection of awesome themes at themes.gohugo.io. After browsing for a while, I ended up liking the minimalism of Anatole, so I picked that. Adding the theme in our repository is as simple as:
git submodule add https://github.com/lxndrblz/anatole.git themes/anatoleAfterwards, update
config.tomlto specify the theme and some configuration options:# config.toml baseURL = 'https://neoaggelos.github.io/' languageCode = 'en-us' title = 'Blog' theme = 'anatole' [params] title = 'Angelos Kolaitis' author = 'Angelos Kolaitis' description = 'Software Engineer, Canonical' profilePicture = 'images/profile.png' mainSections = ['blog'] contentRatio = 0.7
Write some content
At this point, we are ready to start adding content to our blog. We can add a new page with the following command:
hugo new blog/001-hello-world.mdOur new file is created at
content/blog/001-hello-world.md. Spend a couple minutes writing a Hello World post and remove thedraft: truefrom the frontmatter of the document.When editing, I quite liked the
hugo servercommand, which starts a development server at http://localhost:1313 and is updated automatically as I edit the Markdown files. Neat!# content/blog/001-hello-world.md --- title: "Hello World" date: 2021-12-30T12:46:48+02:00 --- Hello World! In this first post, ...After being happy with the result, create a commit with the changes:
git add .
git commit -m 'Add hello world post'
Create workflow to publish to GitHub Pages
We will create a GitHub action that will run whenever we push changes to the master branch of our repository (that is, when we do git push origin master). It will automatically build our site using Hugo and publish to GitHub Pages.
If you have not already, create a new GitHub repository. If your username is
@neoaggelos, then the repository should be calledneoaggelos.github.io. As you might have guessed, our blog will then be published at https://neoaggelos.github.io.Create a new
publish.yamlfile under.github/workflowsinside the Git repository:mkdir -p .github/workflows touch .github/workflows/publish.yamlOpen it on your favourite editor and add the following contents in it:
# .github/workflows/publish.yaml
name: Build and Deploy Site
on:
  push:
    branches:
      - master
jobs:
  build:
    runs-on: ubuntu-latest
    steps:
      - name: Checkout repo
        uses: actions/checkout@v2
        with:
          submodules: true
          fetch-depth: 0
      - name: Setup Hugo
        uses: peaceiris/actions-hugo@v2
        with:
          hugo-version: latest
      - name: Build site with Hugo
        run: hugo --minify
      - name: Deploy to GitHub Pages
        uses: peaceiris/actions-gh-pages@v3
        with:
          github_token: ${{ secrets.GITHUB_TOKEN }}
          publish_dir: ./public
Save the file, and commit:
git add .github
git commit -m 'Add GitHub actions workflow to publish to GitHub pages'
Push to GitHub
We are now ready to publish our blog! If you have not already, configure the origin remote and push our master branch:
# replace neoaggelos with your own username
git remote add origin git@github.com:neoaggelos/neoaggelos.github.io
git push -u origin master
We can then open the repository and GitHub, and see that our action has run successfully:

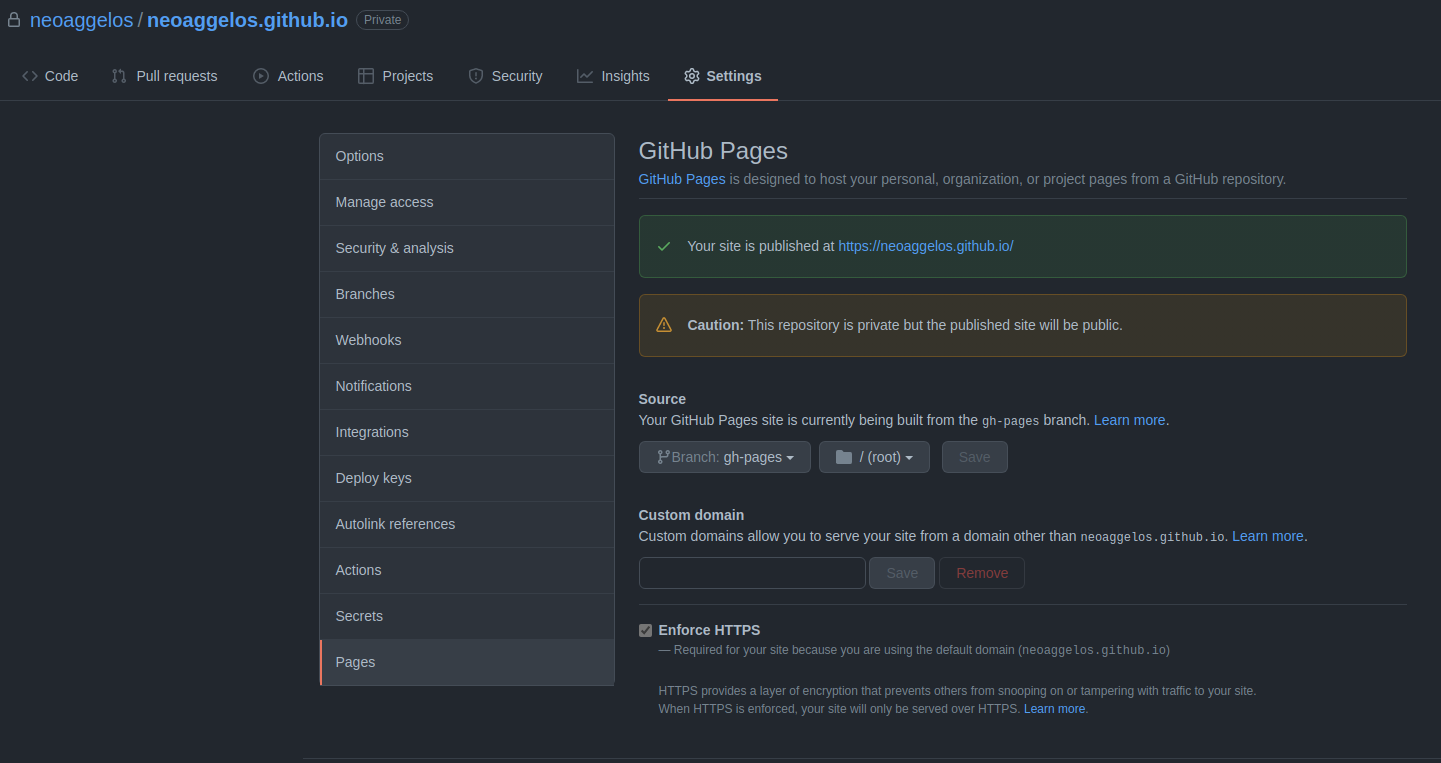
Before we can access our site, we need to do one more change. Go to Settings > Pages and make sure that you set the Source to the gh-pages branch.
Success!
Our blog is now live at https://neoaggelos.github.io.